Get some work done today. I cleaned up and rebuilt the brake master cylinder with the help of my oldest. He's 11 and I'm trying to get him to enjoy cars like I do...especially little British ones. So, he did all of this rebuild (with my help and guidance) all by himself. The cap on this one is pretty rough. I thought I had another one around but couldn't find it...I'll look more tomorrow.
 |
| Brake master cylinder all ready to go. |
 |
| Both masters installed. |
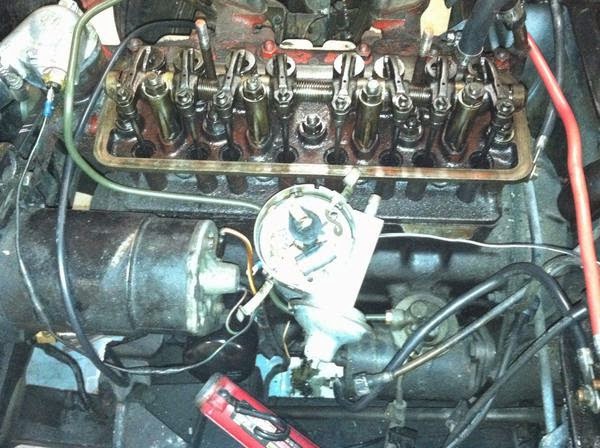
After that, we installed both master cylinders and connected them up to the pedals. This leveled out my clutch pedal (duh!) problem that I mentioned in yesterday's post. The clevis pin for the clutch master was grooved pretty good, so I'll be getting a new one of those. I also used stainless cotter pins, which ended up being a mistake. You may notice that I forgot to put the dust boots on. Turns out you need to do that BEFORE you connect the linkage. The mistake with the stainless cotter pins made itself apparent as they are a real pain to remove. Also, there's another problem with this picture.
 |
| Crooked clutch master. |
If you look closely at the clutch master, however, you'll notice that it's a bit crooked. Turns out the mounting bracket is bent...didn't notice until I got it installed. So, since I would assume that over time this will wear the internal rubber seal on that side excessively and lead to premature failure, I'll be putting in another mounting bracket. This lead to identification of another issue. The car came with the installed masters and one more of each, all in their brackets. Turns out, the brake master's bracket is different than that clutch one. I assume this is for strengthening, but not quite sure why. So, I will remove both masters, swap the bracket on the brake for the clutch (straightening that up) and then cleaning, priming and painting the correct brake master bracket.
 |
| Horrible pic, but you can see difference in brackets...that horizontal support right below the cylinder's top mounting bolt |
I also convinced myself today that my ignition timing is way off and this is why I cannot get the car started. And, when I say way off, I mean by a whole cylinder. My starting problems began when I set the static timing...should have paid more attention and taken more pictures, but I set it right off the manual so I was confident. Anyway, looking at the pictures in the owner's manual and the workshop manual (and some cars I've found online), #1 plug wire (and hence, the rotor) is at the top left of the distributor as you look down. However, the way I have it set up, that's where #2 is (i.e., the last in the firing order). So, this would provide the totally wrong firing order and not let the car start.
 |
| Where I think my TDC should be...this is not my car, by the way. |
Now, of course, I could have just screwed this up. However, the engine has been replaced, but the MK1 and MK2's are identical for distributor versus cylinder positions (as far as I can tell). I have an extra distributor that came with the car, so I assume that its been replaced. Also, when I line up the TDC hole on the crank pulley with the arrow on the timing chain cover, the rotor is at the bottom left, hence why I set it there.
So, tomorrow, I intend to pull the #1 spark plug and rotate the engine to actually sight TDC through the plug hole and then compare this to the TDC mark on the crank pulley. If this is off, then I know I have problems and I'll go from there. If not, then it's something else entirely. However, I'm pretty sure it's something in this area. I think the first thing I will do is just swap the plug wires to what the manuals show and see what happens...would be neat if she just started, huh? More to follow...


You should be able to straighten that master cyl bracket without much fuss. Just get a solid square hunk of metal put inside it and tap away till you get it to the desired shape.
ReplyDeleteI also see that your brake master cyl has a small 'shelf' on the inside just below the top mounting bolt, but the rebuilt photo you have a different bracket.
Btw, holler at me on the forum if you need another mounting bracket. I have a few spares.